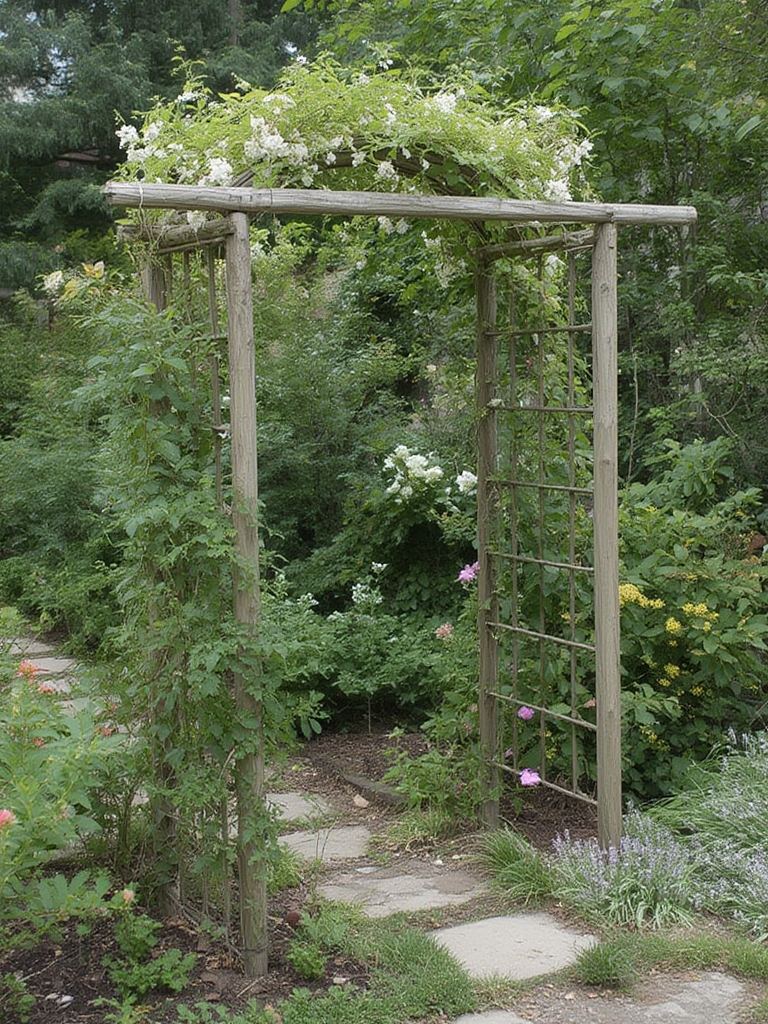
Garden Arbor & Pergola Ideas: DIY Shade Structures
Is your backyard yearning for a touch of elegance, a haven for relaxation, or perhaps an elevated space for your climbing plants to flourish? Crafting your own outdoor retreat can transform your garden into a personal sanctuary. Imagine sipping your morning coffee under dappled sunlight or enjoying an evening breeze as fragrant blooms climb gracefully overhead. Building a custom garden arbor pergola isn’t just a DIY project; it’s an investment in your home’s beauty, your personal well-being, and an incredible way to extend your living space outdoors. This guide will walk you through the journey of creating stunning shade structures that provide both aesthetic appeal and practical support for your burgeoning garden.
Materials & Supplies
Embarking on your arbor or pergola project requires a thoughtful selection of materials to ensure durability and beauty. Here’s what you’ll typically need:
- Lumber: Pressure-treated cedar, redwood, or Douglas fir are excellent choices for their weather resistance and natural beauty. For an arbor, consider 4x4s for posts and 2x4s or 2x6s for top beams and cross-members. For a larger pergola, you might opt for 6×6 posts and heavier beams.
- Hardware: Galvanized or stainless steel screws (3-inch and 6-inch), carriage bolts, and joist hangers are crucial for structural integrity and rust prevention.
- Concrete Mix: For securing posts, particularly in areas prone to high winds or soft soil.
- Post Hole Digger or Auger: Essential for digging deep, stable post holes.
- Measuring Tape, Level, and Speed Square: For precise measurements and ensuring everything is plumb and level.
- Saw: A miter saw or circular saw for accurate cuts.
- Drill: For pilot holes and driving screws.
- Shovel and Trowel: For mixing concrete and backfilling.
- Optional: Lattice panels for added privacy or climbing plant support, paint or stain for weather protection and aesthetic enhancement, and climbing plants (roses, wisteria, clematis, grapes) to complete the look.
Timing / Growing Schedule
While constructing your garden arbor pergola doesn’t involve “growing” in the traditional sense, timing is still key. Plan your build during a dry spell, ideally in late spring or early summer, to avoid working in muddy conditions and to allow ample time for concrete to cure. Most DIY arbor projects can be completed in a single weekend, while a larger pergola might take 2-4 weekends, depending on complexity and helping hands. If you plan to adorn your structure with climbing plants, install them in early spring to give them the entire growing season to establish and begin their ascent, covering your new garden arbor pergola.
Step-by-Step Instructions
Building your own backyard masterpiece is simpler than you think. Follow these steps for a sturdy and beautiful result:
- Plan Your Design: Sketch out your vision, including dimensions. Consider the sun’s path and how you want the shade to fall. Use string and stakes to mark the footprint in your yard. Tip: A well-thought-out plan saves time and materials later.
- Dig Post Holes: Dig holes 2-3 feet deep, ensuring they are equidistant and aligned. The depth should be at least 1/3 of the post’s height above ground. Trick: Use a string line stretched between stakes to ensure perfect alignment.
- Set the Posts: Place a small layer of gravel at the bottom of each hole for drainage. Insert posts, ensuring they are plumb with a level. Fill holes with concrete, bracing posts until the concrete sets (typically 24-48 hours).
- Attach Support Beams: Once posts are secure, measure and cut your horizontal support beams. Attach them to the top of the posts using carriage bolts or heavy-duty screws, ensuring they are level. Advice: Pre-drill holes to prevent wood splitting.
- Install Rafters/Cross Members: Cut and evenly space your rafters across the top of the support beams. Secure them with joist hangers or toe-nailing with screws. This creates the classic slatted look. Small actionable advice: Notch the rafters slightly where they rest on the beams for a cleaner, more secure fit.
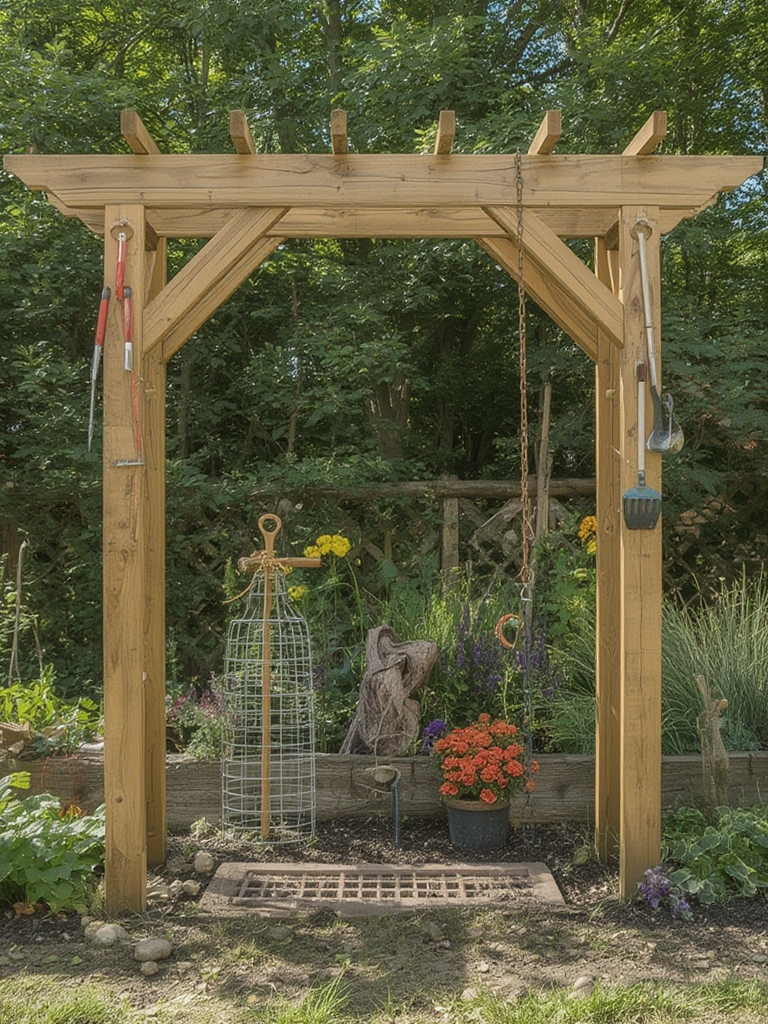
- Add Finishing Touches: If desired, attach lattice panels for added privacy or climbing plant support. Stain or paint the entire structure to protect it from the elements and match your garden’s aesthetic.
Advantages of Garden Arbors & Pergolas
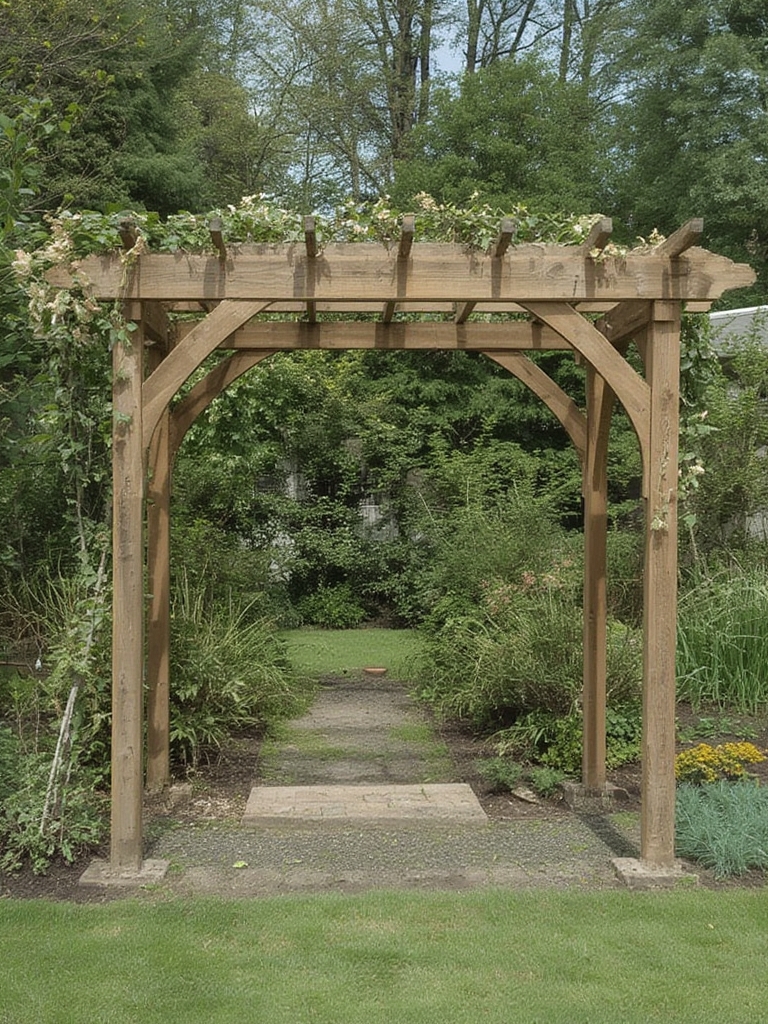
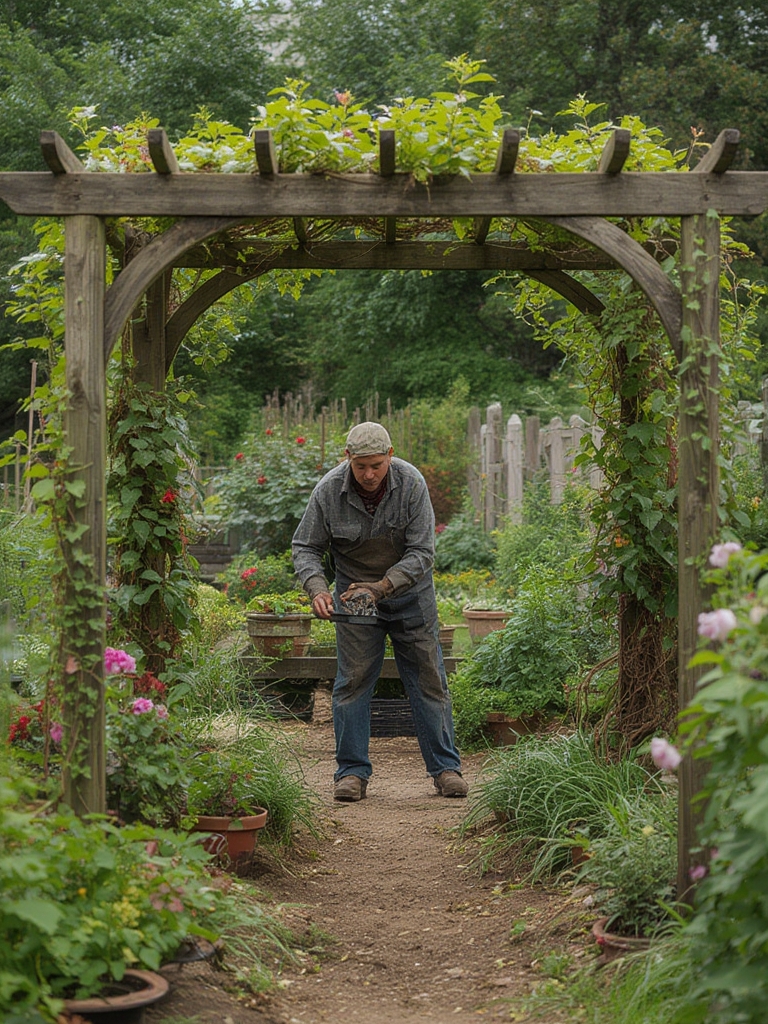
Beyond their undeniable beauty, garden arbor pergola structures offer a myriad of benefits. They provide much-needed shade, creating cooler microclimates for both people and shade-loving plants. As backyard shade structures outdoor growing support, they dramatically expand your garden’s vertical growing potential, allowing vines and climbing roses to thrive, adding fragrance and visual interest. A well-placed arbor or pergola defines outdoor “rooms,” enhancing garden flow and providing a focal point. Data shows that well-designed landscaping features, including pergolas, can significantly increase property value and appeal, making your home more attractive to potential buyers.
Tips, Alternative Methods, or Gardening Advice
- For Small Spaces: Consider a compact arbor over a garden gate or a wall-mounted pergola attached to your house to save footprint.
- Material Alternatives: For a rustic look, use reclaimed wood or even bamboo. Metal arbors are durable and require less maintenance. For a more modern vibe, opt for clean lines and dark-stained wood.
- Climate Considerations: In very hot climates, consider adding a retractable shade canopy to your pergola for adjustable sun protection. In areas with heavy snow, ensure your structure is built to withstand the load.
- Planting Smart: Choose plants that are appropriate for your climate and the amount of sun the structure receives. Fast-growing annual vines (morning glory, thunbergia) offer quick coverage, while perennials (wisteria, climbing roses) provide long-term beauty.
Common Mistakes to Avoid
- Insufficient Post Depth: Not digging holes deep enough or using enough concrete can lead to unstable structures that can wobble or even collapse. Ensure posts are at least 1/3 in the ground.
- Neglecting Drainage: Failing to add gravel at the base of post holes can trap water, leading to rot and premature decay of wooden posts.
- Improper Leveling: A crooked arbor or pergola will look unprofessional and compromise its structural integrity. Use a level constantly throughout the build.
- Using Untreated Wood: Non-pressure-treated wood will quickly succumb to rot, pests, and weather damage, drastically shortening your structure’s lifespan.
- Forgetting Maintenance: Even the best-built structures need care. Neglecting staining or sealing can lead to fading, cracking, and rot.
Storage / Maintenance Tips
Your new garden arbor pergola, while designed to be durable, will benefit from regular maintenance. Inspect it annually for loose screws, rot, or insect damage, especially before winter. Reapply wood stain or sealant every 2-3 years, or as recommended by the product manufacturer, to protect against UV rays and moisture. For climbing plants, regular pruning is essential to guide their growth, prevent them from becoming too heavy, and ensure air circulation. During severe weather warnings, consider temporarily removing any hanging elements that could become projectiles.
Conclusion
Building a custom garden arbor pergola is a rewarding project that elevates your outdoor living experience and provides exceptional backyard shade structures outdoor growing support. With careful planning, the right materials, and a little elbow grease, you can create a beautiful, functional, and long-lasting addition to your garden. So why wait? Take the plunge and transform your backyard into the serene, captivating oasis you’ve always dreamed of.
Have you built an arbor or pergola? Share your tips, triumphs, or challenges in the comments below! Looking for more garden inspiration? Explore our other posts on creating your ideal outdoor space.
FAQs
Q1: How long will a DIY wooden arbor/pergola last?
A1: With proper material selection (pressure-treated wood) and regular maintenance (staining/sealing), a well-built wooden structure can last 15-20 years or more.
Q2: What’s the difference between an arbor and a pergola?
A2: An arbor is typically a smaller, arch-like structure designed to support climbing plants and often marks an entrance. A pergola is larger, with an open roof of crossbeams, providing partial shade over a patio or walkway.
Q3: Do I need a permit to build an arbor or pergola?
A3: For smaller arbors, typically no. For larger pergolas, especially those attached to your house or exceeding certain dimensions, a permit might be required by your local municipality. Always check with your local planning department before starting.
Q4: What are the best climbing plants for an arbor or pergola?
A4: Popular choices include climbing roses, wisteria, clematis, honeysuckle, jasmine, and grapevines. Choose varieties suited to your local climate and desired level of maintenance.
Q5: Can I build a pergola without setting posts in concrete?
A5: While possible with specialized post bases anchored to existing patios or decks, setting posts in concrete directly in the ground offers the most stability and is generally recommended for freestanding structures, especially in windy areas.