Indoor Herb Garden Setup: Lighting, Containers & Care for Year-Round Herbs
Indoor Herb Garden Setup: Lighting, Containers & Care for Year-Round Herbs
Dreaming of fresh basil for your pasta, fragrant rosemary for your roasted chicken, or zesty mint for your mojitos, even when the snow is falling? An indoor herb garden setup is your secret weapon to enjoying these culinary delights year-round. It’s more achievable than you might think, and the rewards are incredibly satisfying. As a gardening blogger and SEO enthusiast, I’m here to guide you through every step, from choosing the right spot to keeping your leafy friends happy and thriving. Let’s get your kitchen smelling like a gourmet chef’s paradise!
Plant Requirements & Supplies
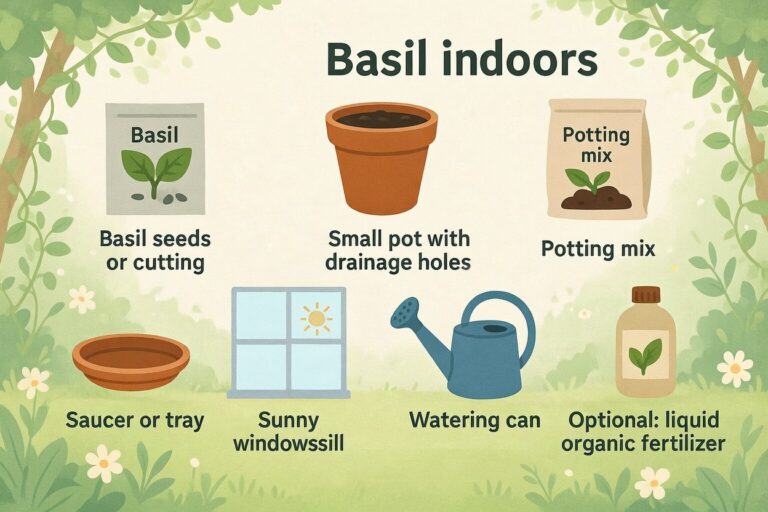
Before we dive into the exciting world of nurturing your own indoor herb garden, let’s gather our essentials. Think of this as your starter kit for green thumb success!

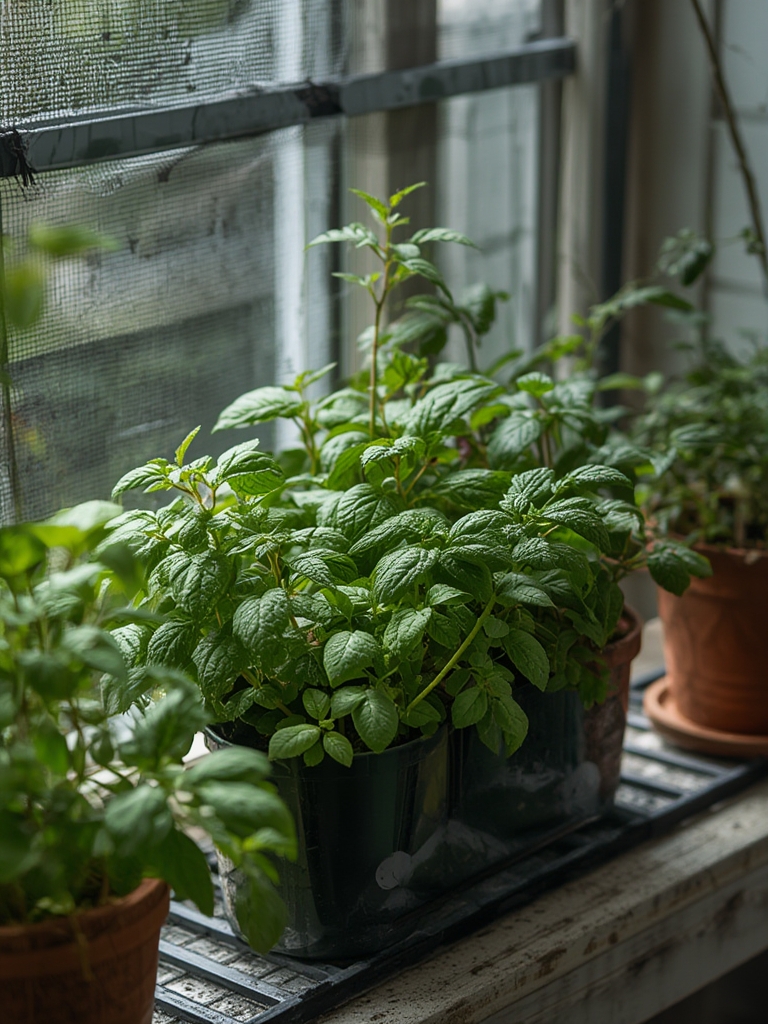
- Herbs: The stars of the show! Start with easy-to-grow varieties like basil, mint, chives, parsley, oregano, and thyme. Consider what you use most often in your cooking.
- Containers: Pots with drainage holes are crucial to prevent waterlogged roots. Terracotta pots are great for breathability, while plastic pots retain moisture. You can also use repurposed containers like mason jars (ensure drainage is added) or old tins.
- Potting Mix: A good quality, well-draining potting mix is essential. Avoid using garden soil, as it can compact in pots and may harbor pests or diseases.
- Light Source: This is paramount for an indoor herb garden setup. Most herbs need at least 6-8 hours of bright light per day. A sunny south-facing windowsill is ideal. If natural light is insufficient, invest in grow lights. Full-spectrum LED grow lights are energy-efficient and provide the necessary light spectrum for healthy growth.
- Watering Can or Spray Bottle: For gentle watering.
- Small Trowel or Spoon: For potting and repotting.
- Fertilizer (Optional): A diluted liquid fertilizer can give your herbs a boost, especially during their active growing season.
Step-by-Step Care Instructions
Setting up your indoor herb garden setup is a rewarding process. Follow these steps for a thriving indoor oasis:

- Choose Your Location: Select a spot that receives plenty of bright light. A south-facing window is your best bet. If you don’t have adequate natural light, plan to use grow lights.
- Prepare Your Containers: Ensure all your pots have drainage holes. If you’re reusing containers, wash them thoroughly to prevent the spread of diseases.
- Fill with Potting Mix: Fill your chosen containers with a high-quality, well-draining potting mix. Leave about an inch of space at the top for watering.
- Plant Your Herbs: You can start from seeds or seedlings.
- From Seeds: Follow the instructions on your seed packet for planting depth and spacing. Lightly water the soil.
- From Seedlings: Gently remove the seedling from its nursery pot. Loosen any tightly bound roots. Place the seedling in the center of your new pot and fill in with potting mix around it. Water thoroughly.
- Initial Watering: Water your newly potted herbs until water drains from the bottom of the pot. This ensures the soil is evenly moistened.
- Placement and Light: Position your newly potted herbs in their chosen location. If using grow lights, position them according to the manufacturer’s recommendations, usually 6-12 inches above the plants. Set a timer for 12-16 hours of light per day.
Growing & Care Schedule
Consistency is key to a successful indoor herb garden setup. Here’s a general schedule to keep your herbs happy:
- Daily: Check on your herbs. Look for signs of wilting, pests, or disease. If using grow lights, ensure they are on for their designated time.
- Weekly:
- Watering: Water your herbs when the top inch of soil feels dry to the touch. The frequency will depend on the herb, pot size, and environmental conditions. It’s better to underwater slightly than to overwater.
- Check for Pests: Inspect leaves and stems for any unwelcome visitors.
- Bi-Weekly/Monthly:
- Fertilizing (Optional): If your herbs seem to be lacking vigor, feed them with a diluted liquid fertilizer (half strength) once a month during the growing season (spring and summer). Reduce or stop fertilizing in fall and winter when growth naturally slows.
- Rotate Pots: If your light source is directional (like a window), rotate your pots every week or so to ensure even growth.
Benefits of Proper Care
A well-maintained indoor herb garden setup offers more than just fresh ingredients. It enhances your cooking, brightens your home, and can even boost your well-being. When you grow herbs indoors winter lighting watering correctly, you’ll experience:
- Fresh, Flavorful Ingredients: Elevate your meals with vibrant, aromatic herbs.
- Cost Savings: Reduce your grocery bill by growing your own.
- Pesticide-Free Produce: You control what goes into your garden.
- Aromatherapy Benefits: Many herbs release pleasant scents that can improve mood and reduce stress.
- A Connection to Nature: Even a small indoor garden can bring the calming presence of the outdoors inside.
- Year-Round Availability: Enjoy your favorite herbs regardless of the season.
Alternative Care Methods
While the basic principles of light, water, and good soil apply to most indoor herb garden setup, some alternative methods can be beneficial:
- Self-Watering Pots: These pots have a reservoir that slowly releases water into the soil, reducing the need for frequent manual watering. This can be a lifesaver for busy individuals or those prone to forgetting to water.
- Hydroponics: For the more adventurous gardener, hydroponic systems grow herbs without soil, using nutrient-rich water solutions. This can lead to faster growth but requires a greater initial investment and understanding of nutrient levels.
- Vertical Gardening: Maximize space by growing herbs vertically using wall-mounted planters or tiered shelves. This is ideal for smaller kitchens or apartments.
Common Care Mistakes
Even with the best intentions, some common mistakes can hinder your indoor herb garden setup. Being aware of these will help you avoid them:
- Insufficient Light: This is the most common pitfall. If your herbs are leggy, pale, or producing small leaves, they’re likely not getting enough light.
- Overwatering: Soggy soil leads to root rot, a common killer of indoor plants. Always check soil moisture before watering.
- Underwatering: While overwatering is more common, letting your herbs dry out completely can also be detrimental, leading to wilting and leaf drop.
- Poor Drainage: Pots without drainage holes are a recipe for disaster. Water needs to escape to keep roots healthy.
- Using Garden Soil: As mentioned, garden soil compacts easily in pots and can introduce pests and diseases. Always use a potting mix.
- Ignoring Pests: Small infestations can quickly become large problems. Regularly inspect your plants for common pests like aphids, spider mites, or whiteflies.
Maintenance & Pruning Tips
Regular maintenance and pruning are essential for a productive indoor herb garden setup.
- Harvest Regularly: The more you harvest your herbs (by pinching or snipping), the more they will grow. Don’t be afraid to use them!
- Pinch Back: For bushy growth, especially with herbs like basil and mint, pinch off the top set of leaves. This encourages the plant to branch out.
- Remove Dead or Yellowing Leaves: This helps the plant conserve energy and prevents the spread of potential diseases.
- Trim Leggy Growth: If your herbs are becoming too tall and spindly, prune them back to encourage bushier growth.
- Repotting: As your herbs grow, they may become root-bound. Repot them into slightly larger containers every year or two, usually in the spring.
Conclusion
Creating a thriving indoor herb garden setup is a journey that brings immense satisfaction and delicious rewards. By understanding your herbs’ needs for light, water, and good soil, and by implementing consistent care practices, you can enjoy fresh, homegrown herbs right from your kitchen windowsill, no matter the season. So, gather your supplies, get planting, and get ready to transform your cooking and your home with the vibrant flavors and fragrances of your very own indoor herb garden! For more insights on keeping your herbs vibrant, check out these grow herbs indoors winter lighting watering tips.
FAQs
Q1: How much light do indoor herbs really need?
A1: Most culinary herbs require at least 6-8 hours of bright light per day. South-facing windows are ideal. If you don’t have adequate natural light, invest in a full-spectrum grow light and run it for 12-16 hours daily.
Q2: How often should I water my indoor herbs?
A2: Water your herbs when the top inch of soil feels dry to the touch. The frequency will vary, so it’s best to check the soil moisture rather than sticking to a strict schedule. Avoid letting them sit in soggy soil.
Q3: Can I grow herbs from seeds indoors?
A3: Yes, absolutely! Growing from seeds is a cost-effective way to start your indoor herb garden setup. Just follow the instructions on your seed packets for planting depth and germination times.
Q4: What if my herbs start looking leggy and pale?
A4: This is a classic sign of insufficient light. Move your herbs to a brighter location or supplement with a grow light. You can also prune back leggy growth to encourage bushier development.
Q5: Do I need to fertilize my indoor herbs?
A5: Fertilizing is optional but can be beneficial, especially during the active growing season. Use a diluted liquid fertilizer (half strength) about once a month. Reduce or stop fertilizing in the fall and winter.